
If there is one item in my collection of makeup that I love, I mean REALLY love, it is the Urban Decay "Naked" palette. All the hype is true...there is a reason it is always sold out! I was one of the lucky few who was able to get a hold of the palette before they ran out late last year. There are 12 eyeshadows in the palette. The palette also comes with a mini primer potion and a duo 24/7 eyeliner in "Whiskey" and "Zero". If you can't tell from above, I love the eyeliners just as much as the palette! The Naked palette retails for $44.00 and can be found at Ulta (when in stock), Sephora or http://www.urbandecay.com/. Currently the palette is in stock at http://www.sephora.com/.
What makes this palette so special is its versatility. Everyone loves a neutral eye look. Everyone also loves a smokey eye look. You can achieve both and everything in between with this palette. There are 12 shades in all-you would spend $204.00 if you were to buy each eyeshadow separately. Each shade is shimmery except there are two matte shades (both brown). The palette includes their famous "Half Baked" eyeshadow and my own personal favorite "Toasted".

L-R-
"Virgin" (an off white shimmer), "Sin" (a champagne shimmer), "Naked" (a light brown matte), "Sidecar" (a glittery champagne), "Buck" (a darker brown matte), "Half Baked" (a metallic gold shimmer), "Smog" (a metallic brown shimmer), "Darkhorse" (a deeper brown shimmer), "Toasted" (a bronze/brown shimmer), "Hustle" (a plum based brown shimmer), "Creep" (a black shimmer) and "Gunmetal" (a gray shimmer).
Below is a tutorial using 6 shades coming from this palette. I wanted a smokey look and getting that was easy since all the shades I needed were right in one palette!

Start by priming your lids with Urban Decay's primer potion. Next apply "Virgin" all over your lid and up to your browbone. Next take "Gunmetal" and apply it to just your eyelid. Blend with your brush until the shade is over your entire lid. Keep blending "Gunmetal" and go up towards your crease, taking the color just above it.
Next step is to take "Darkhorse" and blend it on just the outer corner of your eye. This color will help deepen the look without the being too harsh. Next take another application of "Gunmetal" and apply another layer, this time deepening the shade. Keep blending it over the eyelid, going into the crease and just above it.
After that take "Creep" and blend it into the outer corner of your eye, dragging the shade into the crease. Keep blending it while moving your brush back and forth within your crease.
Next take "Naked" (small amount) and blend it over where "Gunmetal" ended near your browbone. This will help blend out the color line so it is not too harsh above your eye.
After using "Naked" take "Sin" and blend it into the inner corner of your eye. Pat down the color and place it directly over the inner corner then blend up and over onto the eyelid.
Finally take "Virgin" and blend it onto your browbone, keeping the color just underneath your eyebrows. The key to this look is blending. Feel free to keep adding layers of "Gunmetal" and "Creep" for a deeper, more dramatic look.

Notice the darker color is on the outer corner of each eye.
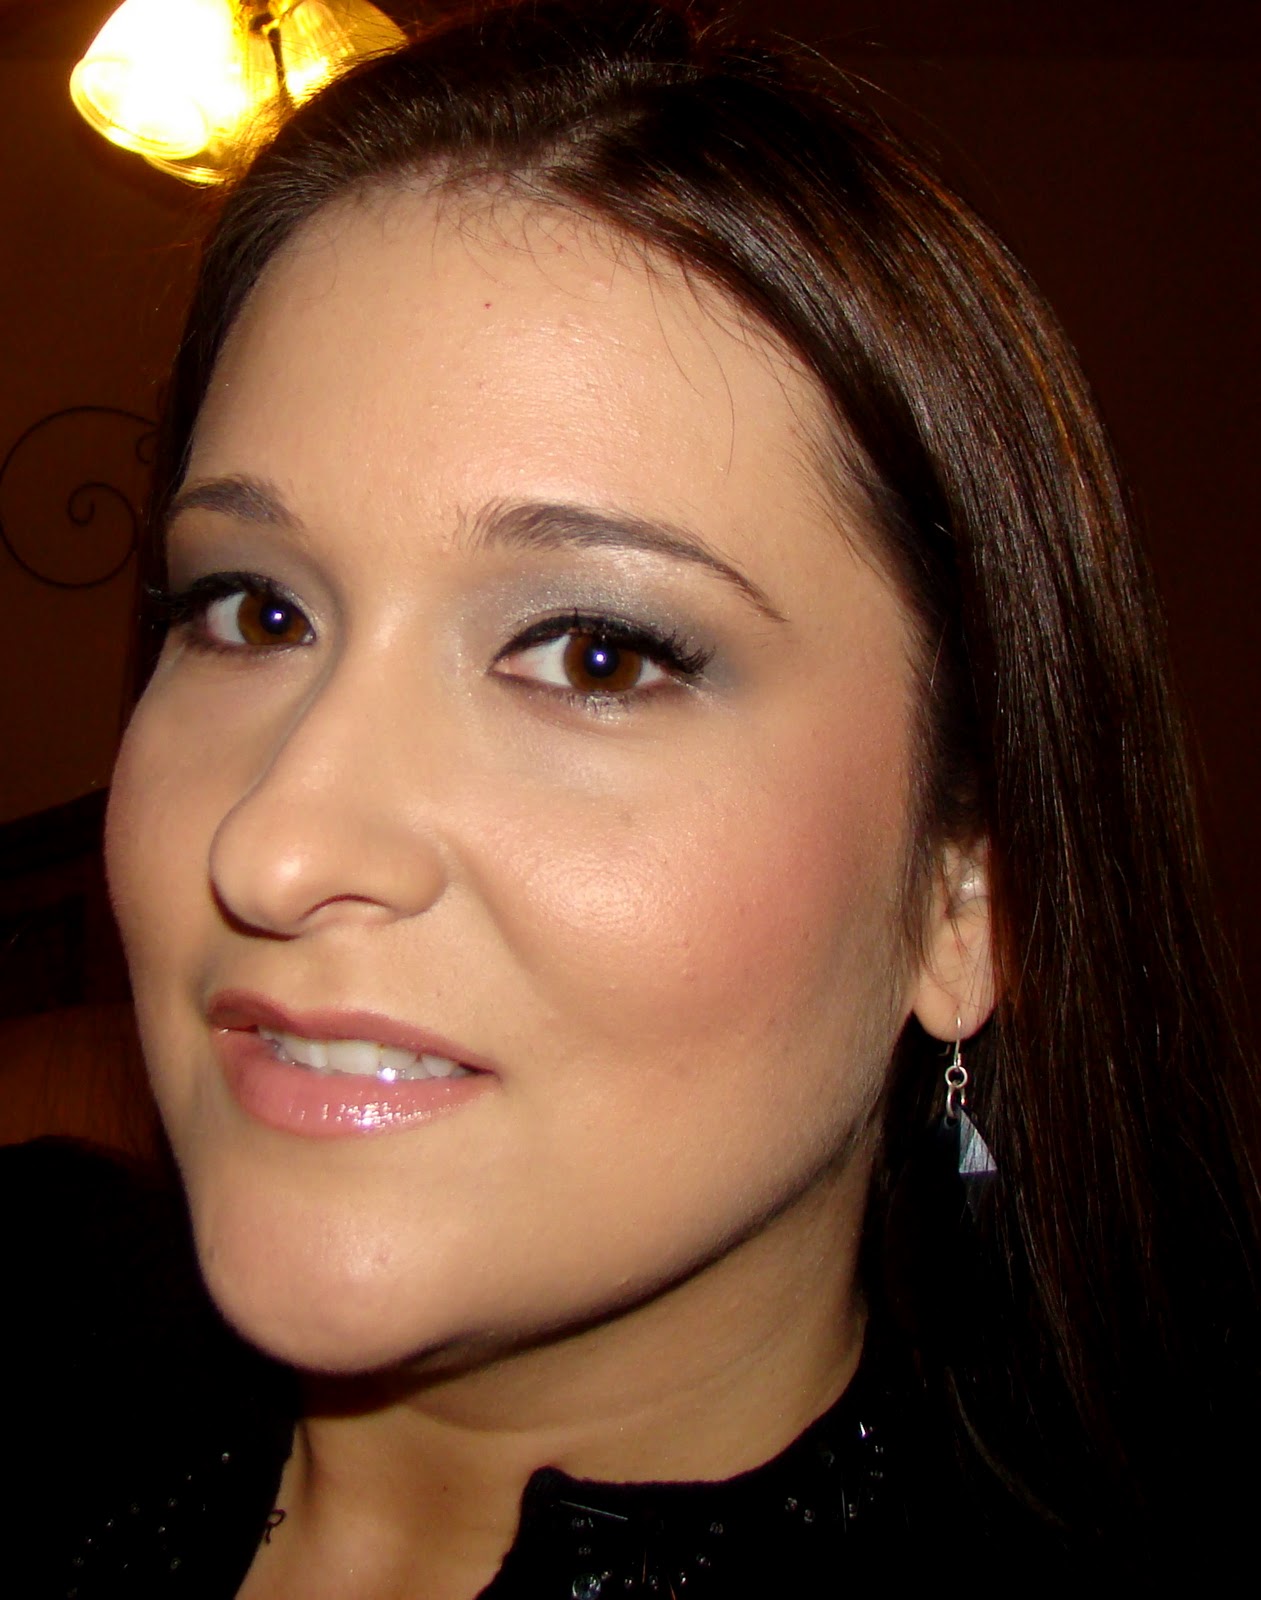
Finished look- Origins VitaZing moisturizer, Clinique All About Eyes serum, Hard Candy Sheer Envy primer, Lancome Teint Idole Fresh Wear in Buff 4C, NARS loose powder in Flesh, Hard Candy bronzer in Hula Hula, MAC mineralize skin finish in By Candlelight, NARS blush in Orgasm, Urban Decay's primer potion, Urban Decay's NAKED palette shadows (Virgin, Sin, Naked, Darkhorse, Gunmetal & Creep), Wet n Wild creme liner in 886, Lancome Hypnose Drama mascara, Ardell lashes in 301, Jordana lip liner in Natural, Loreal lipstick in Fairest Nude and Lancome Juicy Tube in Moulin Rose.
Very pretty! I will definitely be trying this, thanks!
ReplyDelete