Showing posts with label eyeshadow. Show all posts

Sunday, August 7, 2011

Some goodies to try out!

Lately I've been really into girly scents.  I'm loving anything that is floral, flirty or sweet and that makes you feel sexy the minute you spritz them on!  I picked up a new scent by Marc Jacobs today called "Oh, Lola!".  The scent is described as fruity and floral with strawberry, pear, peony, raspberry, sandalwood and vanilla notes.  I am finding that this has worn well today and it has stayed true on my skin even after it dries.  Some scents completely change and go against my chemistry but this one stays soft and doesn't overpower me at all.  I bought the 1.0oz bottle at Ulta for $48.00.


Aside from smelling good even in this sweltering weather, you've got to keep your skin moisturized.  Each time the thermometer rises and my legs come out of hiding, I reach for my cocoa butter.  My legs tend to get dry very quickly and cocoa butter solves the problem.  Some people don't like cocoa butter but I personally love the rich scent and the moisturization it provides.  I have found that Queen Helene's is the best.  It's long lasting, smells pleasant and is cheap.  I've had my tub for over a year and I still have plenty left.  I usually apply it to my legs at night before bed and then I wake up to great skin that looks and feels wonderful.  I got my tub (15oz) at Walmart for $4.00!


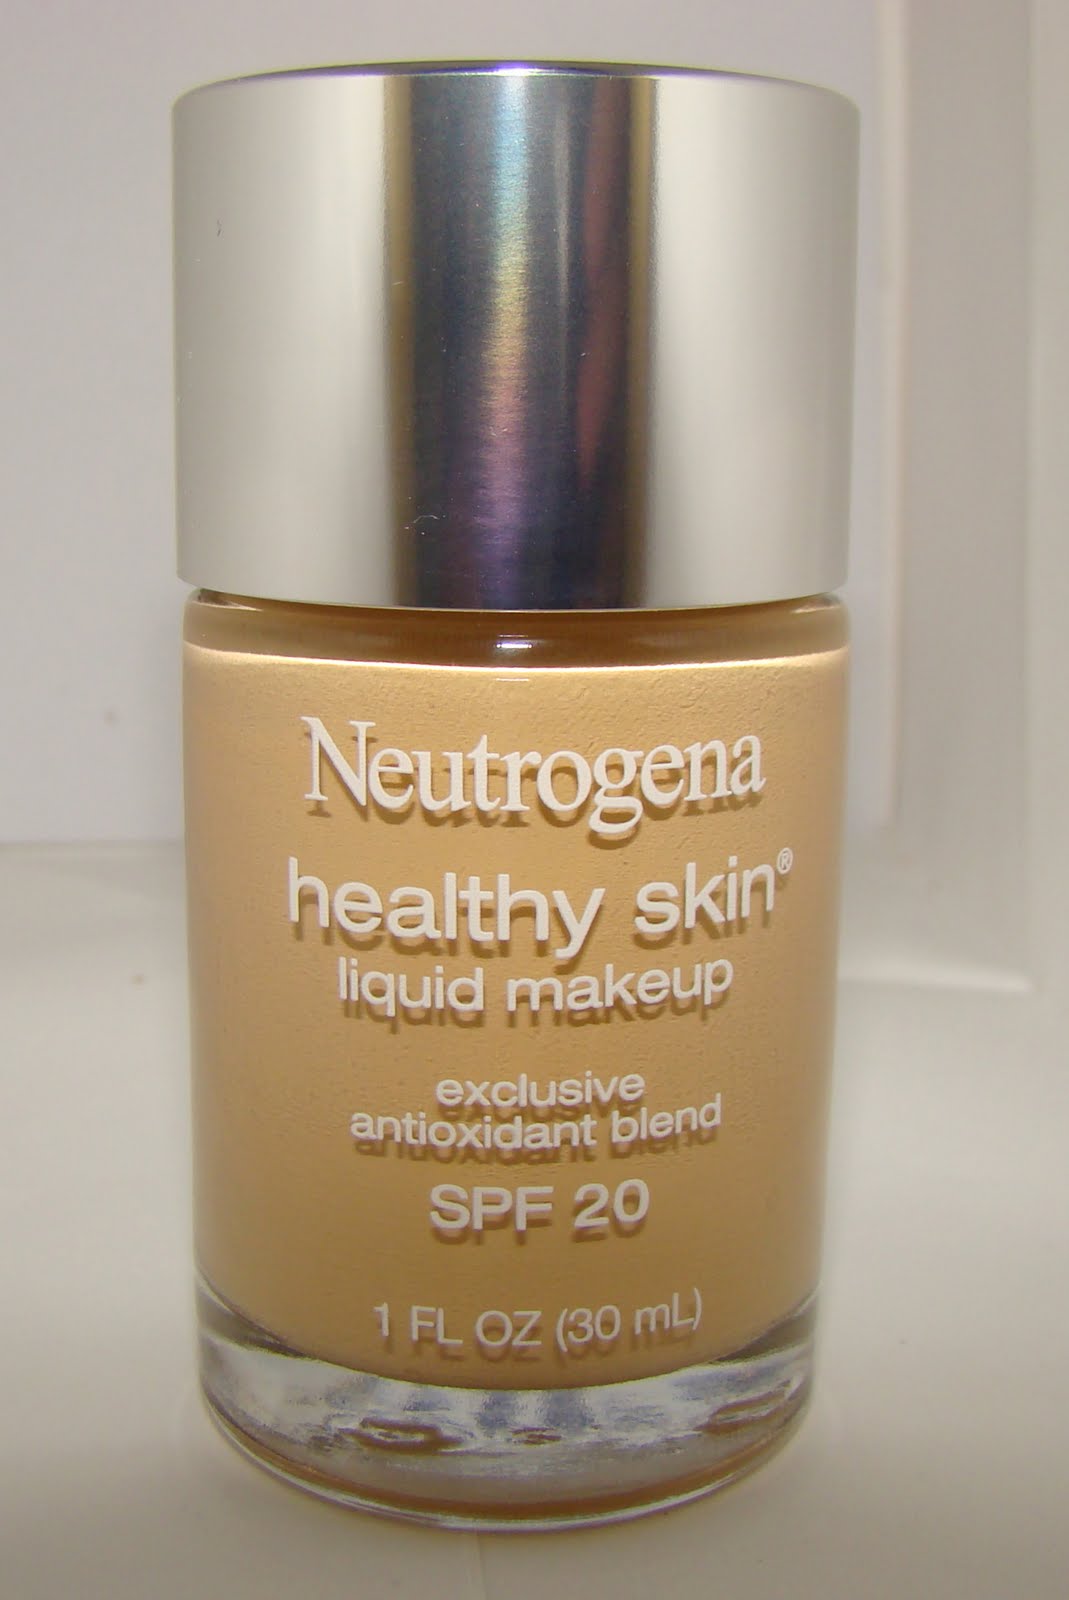
Even in the August heat I find that I want to reduce the amount of foundation I wear.  Some foundation is too thick and too hot.  I recently purchased Neutrogena's Healthy Skin liquid makeup in the shade "Natural Beige".  So far this foundation has worked well with my combination skin.  It hasn't caused any breakouts and has felt light.  Neutrogena states that this foundation has spf20 and an exclusive blend of antioxidants to help skin look younger.  I will say that it's too early to see any real difference but it's lightweight and gets the job done.  The only drawback with this foundation is that it is not full coverage which I prefer if I am going out or wanting to disguise any blemishes.  I purchased mine from CVS for $9.00.


Over the past month I've purchased the Wet n Wild 8 pan palettes which I am proud to say I adore!  In the past Wet n Wild has not disappointed me with any of the purchases I've made.  Almost every eyeshadow in each palette I've bought has turned out lovely, with rich pigmentation.  I was excited to hear about the 8 pan palettes when they were released earlier this year.  I've purchased all 3-Comfort Zone which has gorgeous greens, browns and bronze shades.  I also purchased Blue Had Me at Hello which has icy blues including navy and of course black.  The last palette is Petal Pusher which is full of gorgeous berry shades, purples and a shimmery black color.  Each palette costs around $5.00!


Comfort Zone-numbers 1 & 2 are highlighters, 3 & 4 are for the lid, 5 & 6 are for the crease and 7 & 8 can be used for liners and/or for the crease.


1 & 2 are shimmery champagne colors.  3 is a gorgeous rose gold shade and 4 is a wonderful, green shimmery shade.  5 appears to be a matte copper color but it is actually a soft brown with copper undertones and slight shimmer.  6 is a greenish gray with gold shimmer.  7 is a highly pigmented brown with heavy plum undertones and red shimmer.  8 is the most unique shade of all.  In some lighting it appears copper and in other light it has a green cast to it.  It is very similar to MAC's Club eyeshadow-click here to see my review of MAC's "Club" eyeshadow!


Blue Had Me at Hello- 1 & 2 are highlighters, 3 & 4 are for the lid, 5 & 6 are for the crease and 7 & 8 can be used for liners and/or for the crease.


1 is a white, shimmery highlighter.  2 is an icy blue and 3 is a shimmery gray.  4 is a gorgeous, teal blue.  5 is an extremely deep navy blue whereas 6 is a lighter blue, more similar the color of the ocean.  7 is a matte black and 8 is a shimmery black shade.


Petal Pusher- 1 & 2 are highlighters, 3 & 4 are for the lid, 5 & 6 are for the crease and 7 & 8 can be used for liners and/or for the crease.


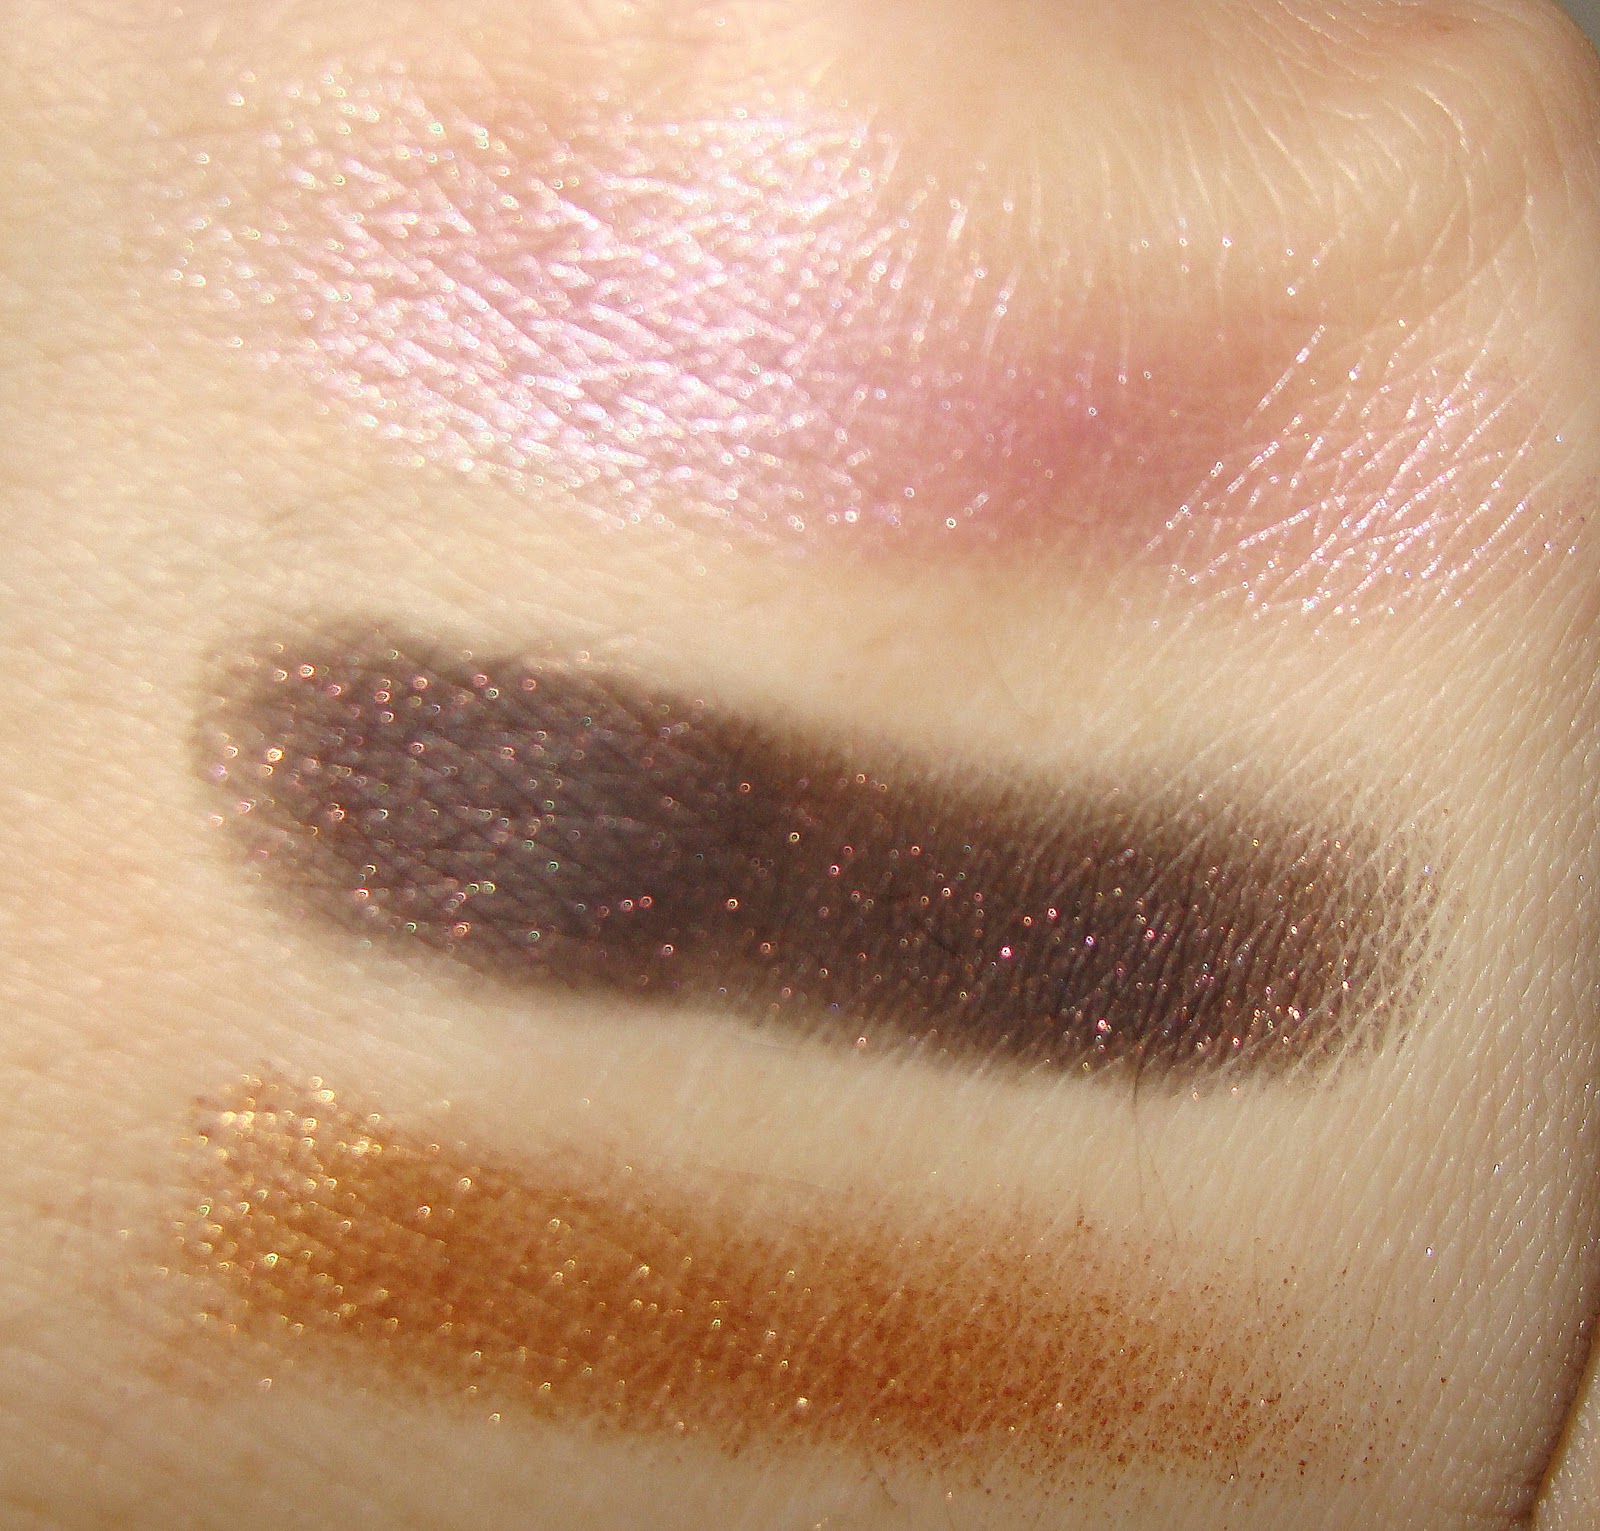
1 is a soft, pale pink with a slight iridescent shimmer.  2 is a shimmery purple/pink and 3 is a light, matte purple.  4 is a shimmery raspberry shade.  5 is a deep purple and 6 is a shimmery berry shade that is very pigmented.  7 is a lovely iridescent purple that almost glows on the skin and 8 is a black with silver shimmer. 


Saturday, February 12, 2011

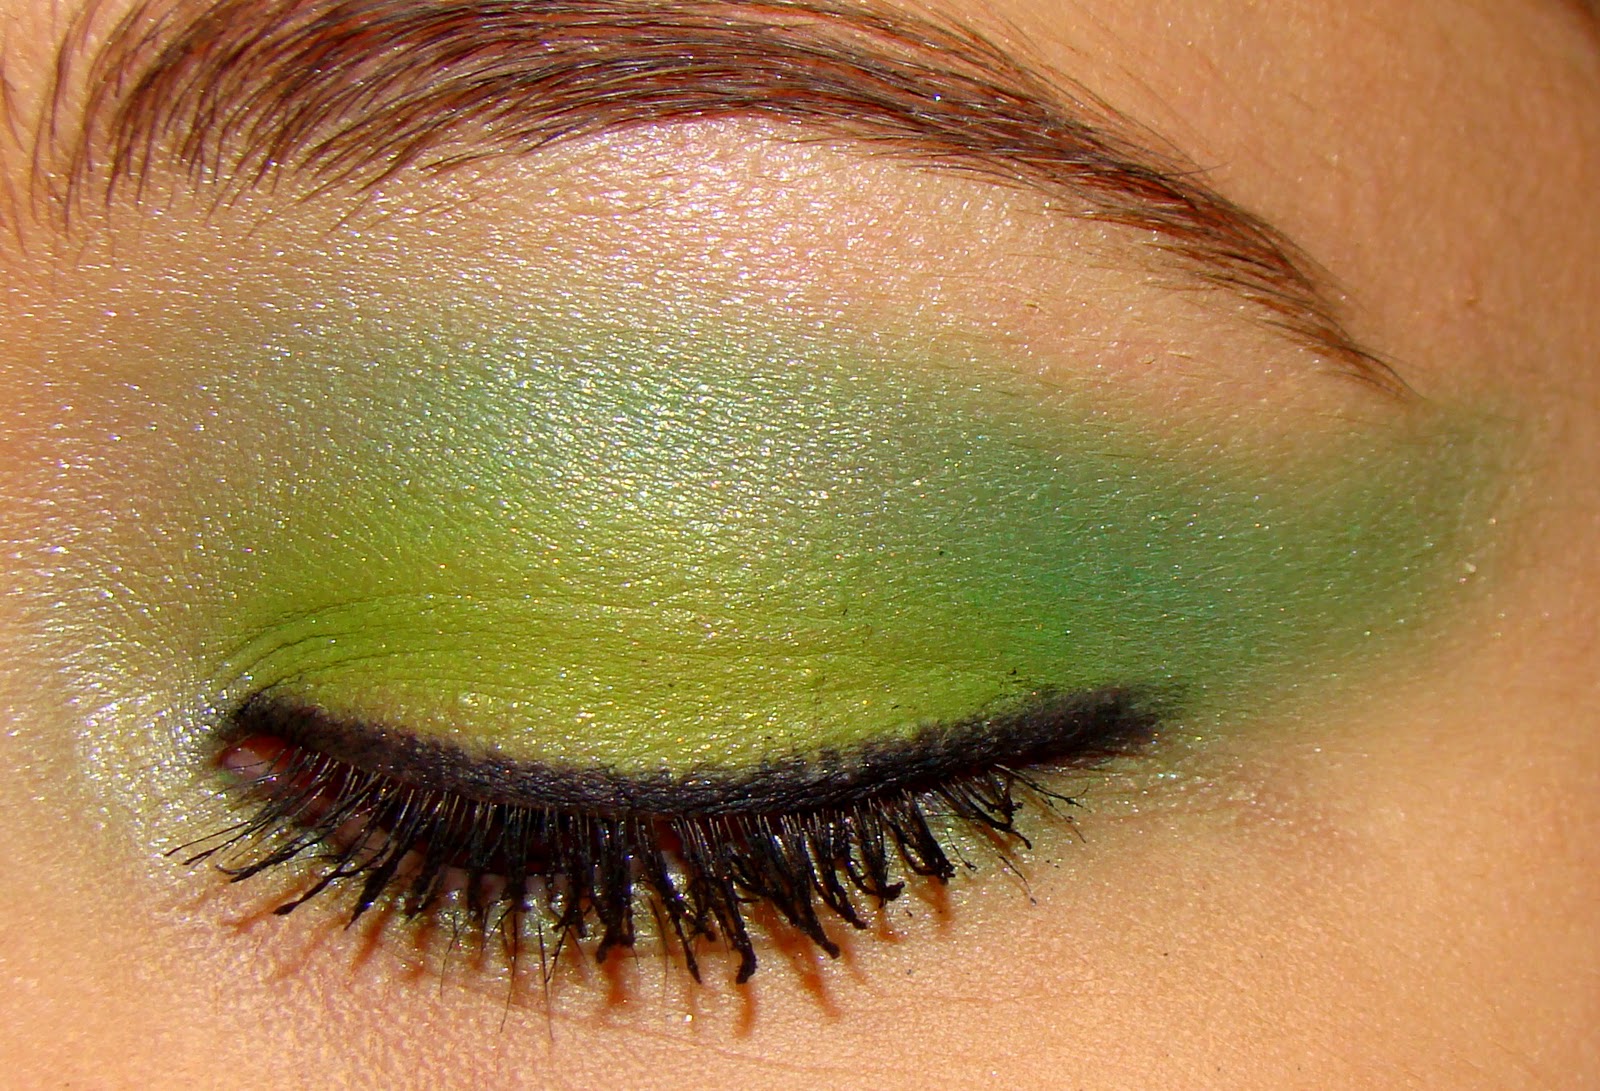
Wet n Wild Tutorial- "I Dream of Greenie"


So after a week of dealing with the flu I decided to jump right back into my blog again by doing a wild and colorful tutorial.  Obviously this look is not for everyday wear but it sure would be fun to wear on St. Patrick's day! 

For this look you will need the "I Dream of Greenie" Wet n Wild eyeshadow palette, eyeshadow primer, black eyeliner and mascara.  I have pictures and swatches of the "I Dream of Greenie" palette in an earlier post along with the other 5 Wet n Wild palettes that are new for 2011 http://itsallprettytome.blogspot.com/2011/01/wet-n-wild-spring-2011-eyeshadow-trios.html.

  I used NYX's jumbo eye pencil in Milk as my primer, Milani's Liquif'eye liner in Black and Lancome's Hypnose Drama mascara in Excessive Black.


After priming your eyelids, take the bottom shade in the palette (vibrant green) and pat it on top of the lid.  Make sure this color is heavily applied so it is vibrant and extends towards the inner and outer corners. 

Next take the middle shade (blue-green color) and apply it into the crease.  Blend this color throughout the crease, moving your brush back and forth.  Keep moving the color, then take it above the crease and towards the browbone.  Take more of this blue-green shade and sweep it outwards, beyond the outer corner of your eye.  You want to take this color and extend it to where it creates a cat-eye effect.  You can also take this color and blend it down on the lower lash line. 


*Notice the blue-green shade extends beyond the outer corner.


Last step is to take the lightest shade (shimmery pale green) and blend it on the browbone and down towards the inner corner.

After applying your eyeshadow, you can then line your water line and upper lash line with black eyeliner.  Finish the look with mascara.


Sunday, February 6, 2011

Urban Decay "Naked" Palette Tutorial


If there is one item in my collection of makeup that I love, I mean REALLY love, it is the Urban Decay "Naked" palette.  All the hype is true...there is a reason it is always sold out!  I was one of the lucky few who was able to get a hold of the palette before they ran out late last year.  There are 12 eyeshadows in the palette.  The palette also comes with a mini primer potion and a duo 24/7 eyeliner in "Whiskey" and "Zero".  If you can't tell from above, I love the eyeliners just as much as the palette!  The Naked palette retails for $44.00 and can be found at Ulta (when in stock), Sephora or http://www.urbandecay.com/.  Currently the palette is in stock at http://www.sephora.com/.

What makes this palette so special is its versatility.  Everyone loves a neutral eye look.  Everyone also loves a smokey eye look.  You can achieve both and everything in between with this palette.  There are 12 shades in all-you would spend $204.00 if you were to buy each eyeshadow separately.  Each shade is shimmery except there are two matte shades (both brown).  The palette includes their famous "Half Baked" eyeshadow and my own personal favorite "Toasted".


L-R-
"Virgin" (an off white shimmer), "Sin" (a champagne shimmer), "Naked" (a light brown matte), "Sidecar" (a glittery champagne), "Buck" (a darker brown matte), "Half Baked" (a metallic gold shimmer), "Smog" (a metallic brown shimmer), "Darkhorse" (a deeper brown shimmer), "Toasted" (a bronze/brown shimmer), "Hustle" (a plum based brown shimmer), "Creep" (a black shimmer) and "Gunmetal" (a gray shimmer).


Below is a tutorial using 6 shades coming from this palette.  I wanted a smokey look and getting that was easy since all the shades I needed were right in one palette!


Start by priming your lids with Urban Decay's primer potion.  Next apply "Virgin" all over your lid and up to your browbone.  Next take "Gunmetal" and apply it to just your eyelid.  Blend with your brush until the shade is over your entire lid.  Keep blending "Gunmetal" and go up towards your crease, taking the color just above it. 

Next step is to take "Darkhorse" and blend it on just the outer corner of your eye.  This color will help deepen the look without the being too harsh.  Next take another application of "Gunmetal" and apply another layer, this time deepening the shade.  Keep blending it over the eyelid, going into the crease and just above it. 

After that take "Creep" and blend it into the outer corner of your eye, dragging the shade into the crease.  Keep blending it while moving your brush back and forth within your crease. 

Next take "Naked" (small amount) and blend it over where "Gunmetal" ended near your browbone.  This will help blend out the color line so it is not too harsh above your eye. 

After using "Naked" take "Sin" and blend it into the inner corner of your eye.  Pat down the color and place it directly over the inner corner then blend up and over onto the eyelid. 

Finally take "Virgin" and blend it onto your browbone, keeping the color just underneath your eyebrows.  The key to this look is blending.  Feel free to keep adding layers of "Gunmetal" and "Creep" for a deeper, more dramatic look.


Notice the darker color is on the outer corner of each eye. 


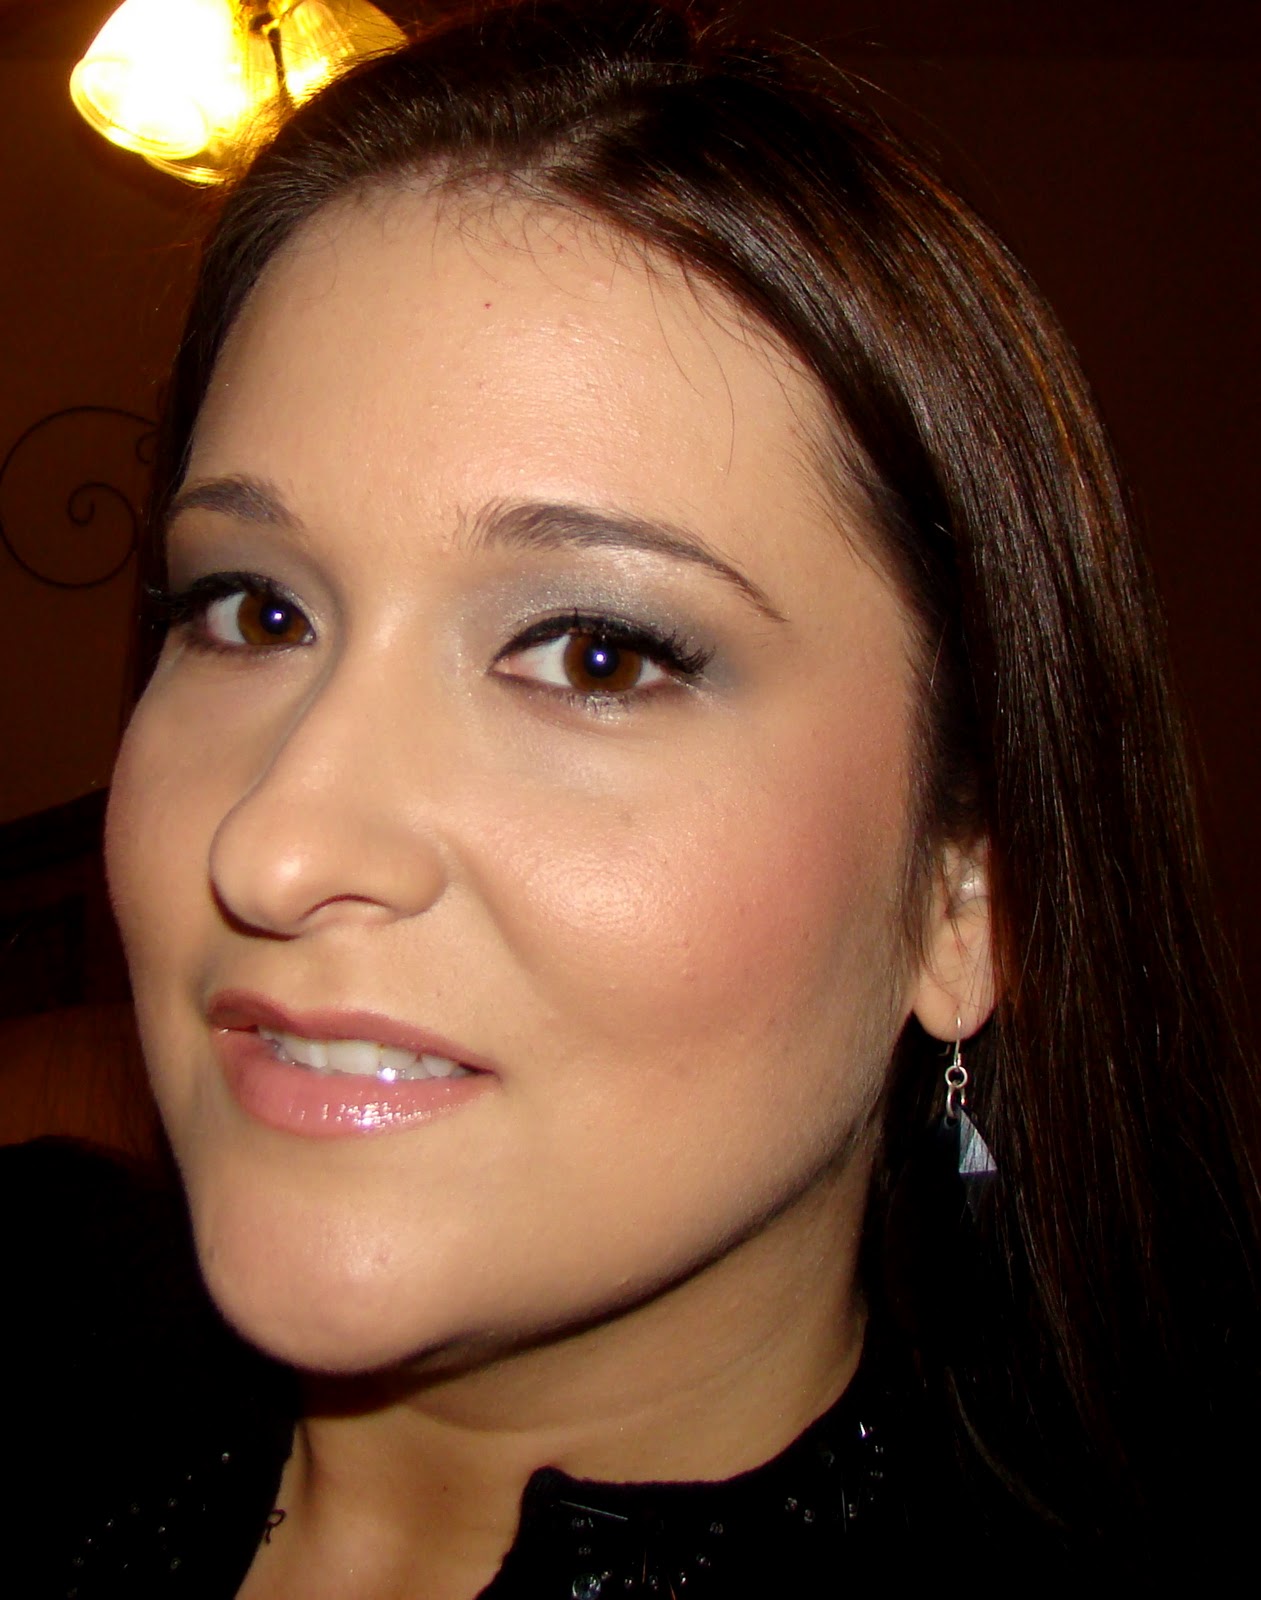
Finished look- Origins VitaZing moisturizer, Clinique All About Eyes serum, Hard Candy Sheer Envy primer, Lancome Teint Idole Fresh Wear in Buff 4C, NARS loose powder in Flesh, Hard Candy bronzer in Hula Hula, MAC mineralize skin finish in By Candlelight, NARS blush in Orgasm, Urban Decay's primer potion, Urban Decay's NAKED palette shadows (Virgin, Sin, Naked, Darkhorse, Gunmetal & Creep), Wet n Wild creme liner in 886, Lancome Hypnose Drama mascara, Ardell lashes in 301, Jordana lip liner in Natural, Loreal lipstick in Fairest Nude and Lancome Juicy Tube in Moulin Rose.


Sunday, January 23, 2011

In Da Club...MAC's Club eyeshadow that is!

I'm all about being lazy on the weekends.  I don't mind putting on a full face of makeup if I have to go somewhere, however if I am only going to Wal-Mart then I put on the least amount possible!  That is what I LOVE about "Club" eyeshadow from MAC.  You can put this eyeshadow on and it looks like you worked all day to apply your makeup.  "Club" eyeshadow is a duochrome which means it changes colors depending on the light it is exposed to.  Apply it on the lids and it appears green.  Blend it into the browbone and it appears like a soft brown!  "Club" can be your secret weapon that you can use when you want to look good without a lot of effort!


*Notice the shimmery green shade fading into a soft brown color.


This look is simple...there is only ONE eyeshadow to use!  Prime your lids with any eyelid primer then begin by taking MAC's "Club" eyeshadow and start applying it at the lash line.  Keep moving the color up towards the browbone.  Take extra effort to blend the color out in the crease. Next take the excess above the crease.  Keep blending the color upwards.  Lastly blend the color on the browbone to where it fades just under the eyebrows.


Full Face Look- NARS Sheerglow foundation in "Ceylan", NARS loose powder in "Flesh", MAC Skin Finish in "Stereo Rose", ELF Studio Line Bronzer in "Warm", Jordana lip pencil in "Natural", Loreal Endless lipstick in "In the Buff", Jesse's Girl lipgloss in "Strawberry", Urban Decay's Primer Potion, Covergirl Lash Blast Fusion mascara and MAC's "Club" eyeshadow.


*You can even add a shimmery color to the inside corner of your eye to brighten the look.  I used Stila's "Kitten" eyeshadow above.

Saturday, January 22, 2011

Another Wet n Wild Tutorial- "Silent Treatment"

Getting ready to go out is a lot fun no matter what age you are.  This evening as I was getting dressed for a date night with my husband, I decided that I would do another look using one of the Wet n Wild trios since it matched my top so well.  I decided to use "Silent Treatment" which quite honestly is now my favorite trio so far.  It's a perfect palette which is daytime friendly but can be smoked out for an evening on the town.  I think each color in this trio would look great on all skin tones, especially the GORGEOUS smokey-purple taupe.  Each shade is shimmery without tons of glitter and each shade blends out very well-no streaks here!


Wet n Wild "Silent Treatment" Trio


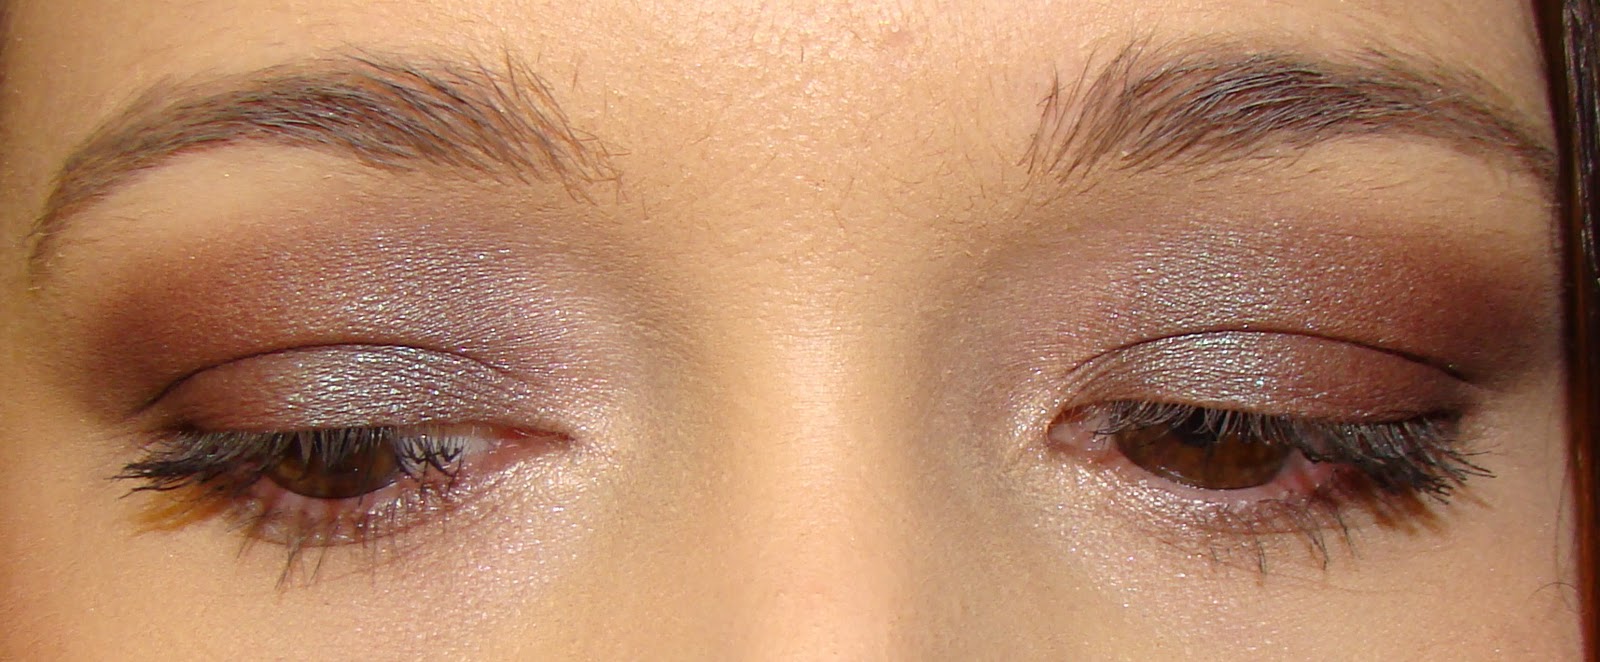
*Completed look without false lashes and extra liner.


This trio is SO EASY to use...partially because the colors blend out so well.  You begin this look by priming your lids with your favorite eyeshadow primer.  Next take a brush and pat down the taupe shade completely over the lid and all the way to the browbone.  Then take the crease color and blend it in well throughout the crease making sure to go all the way through the crease until you almost reach the inner corner of the eye.  Next take the lightest shade (which is a pinky shimmer) and blend it on the browbone all the way to the eyebrows.  Lastly take the same pink shade or a white eyeshadow of your choice and place a little in the inner corner of your eye.  I chose to use Benefits Eye Bright pencil instead of the pink shade in my inner corner.

Once you finish your eyeshadow, line the top lid with a gel liner, apply your mascara and put on false lashes if desired.  I chose to use Ardell's false lashes in "305".


* Completed look with false lashes and additional liner.


Full face look(apologies for the blurry photography)- Wet n Wild "Silent Treatment" eyeshadow trio, Diorshow Blackout mascara, Wet n Wild creme liner, Benefit Eye Bright pencil (in inner corner), NARS Sheerglow foundation in "Ceylan" mixed with Rimmel's Lasting Finish foundation in "Soft Beige", NARS loose powder, ELF Bronzer in "Warm", Wet n Wild blush in "Pearlescent Pink", Jordana lip pencil in "Petal" and Lancome's Color Design lipstick in "Love It!". 

Wet n Wild, Rimmel and Jordana items can be found at Walgreens.  NARS and Benefit products can be found at Sephora.  Lancome can be found at your nearest department store (like Dillards or Macys).


Friday, January 21, 2011

Wet n Wild Tutorial- "I'm Getting Sunburned"

When I first bought this palette, I found out it had broke along the way home.  Instead of just waiting until the next time I was in Walgreens, I immediately went back to the store because I knew this palette would be a favorite...and it is!  Everything about this trio is great.  The pink is gorgeous and not too bright, the crease color is richly pigmented AND the gold is the perfect shade.

I created a look based on this palette.  I find I like to layer the gold and crease color.  I also love to have the pink shade "peek" above the crease because it is beautiful even on its own. 


Begin by priming your eyes with an eyelid primer.  Next take the gold shade and thickly layer it only on your lid.  Afterwards take the crease color and begin by blending it from the outer corner towards the inner corner, stopping right above the middle of the lid.  Keep moving the brush back and forth while blending the color into the gold but not going too far down into the lid space.  Take the gold shade again and blend it upwards towards the brown crease color.  Go over the gold again with the crease color, this time using more of the color and deepening the crease area for more smokiness.  Next take the pink shade and blend it into the upper browbone.  Make an extra effort to blend it with the crease color until there is no longer a definite line between the two shades.  Lastly, take the gold color and blend it into the inner corner of the eye.

After applying the eyeshadow, line the upper lash line with a gel or liquid liner.  You can also apply false lashes if you desire for more drama.  Next take the crease shade, LIGHTLY dip your brush into the crease color and blend down onto the lower lash line.  Finally line the lower lashes with an eyeliner of your choice and apply mascara.


Monday, January 17, 2011

Wet n Wild tutorial - "I Got Good Jeans"

Here is another Wet n Wild tutorial using the "I Got Good Jeans" trio from the 2011 Wet n Wild eyeshadow collection.  The key to this look is blend, blend and blend again!  I really love the soft glow that the gold shade gives and the navy shade really makes a lovely crease color. 


"I Got Good Jeans" palette


Begin by priming your eyes with an eyeshadow primer like Urban Decay's Primer Potion or you can even use a Mac Paintpot or creme stick like NYX eye pencil in "Milk" which is what I chose to use for this look. 

After priming the eyelid pat down the gold color all over the lid and up to the crease.  If you have hooded eyes like myself, go above the crease with the gold color.  Next, take the navy color and blend from the outer corner inward all through the crease until you are 3/4 of the way in.  Stop blending the navy shade inward when you are over the iris of your eye.  Keep blending the navy into the gold and blend the navy above the crease if you have hooded eyes. 

Go back after blending the navy and pat down more gold color over the lid, focusing on the inner corner.  This will help freshen and replenish the color in case there was fallout from the navy shade.  Using the light blue shade, blend it on the very top portion of the navy color-all over the browbone.  For the final two steps take the navy shade again and blend more on the outer corner of the eye. Lastly, take a small amount of the gold shade and place it on the inner corner of the eye.


*Notice the darkest shade is used on the outside corner and the lightest shade is focused on the inside corner of the eye.


Final Look- Rimmel Lasting Finish liquid foundation in "Soft Beige", NARS loose powder in "Flesh", NYC Smooth Skin bronzer in "Sunny", Covergirl Cheekers blush in "Brick Rose", Diorshow mascara, L'oreal Endless lipstick in "In the Buff" and Rimmel Vinyl Bronze lipgloss in "Summer Nude".

Sunday, January 16, 2011

Wet n Wild Tutorial

Here is a quick tutorial using the "Spoiled Brat" trio from the Wet n Wild 2011 collection (please see review below in previous blog entry).  There are 3 colors in this palette-shimmery grey, soft black with slight glitter reflects and a bright, almost neon pink. 

I wanted to use this palette yet show how you can create a look with "bright and scary" colors without going overboard.  Using the palette as a guide, you can create a soft, yet colorful look without looking like a clown :-)


"Spoiled Brat" palette


The final look above-pink shade applied all over the lid then a small amount of the black shade blended into the crease.  Next take the shimmery grey shade and blend it on the very top portion of the black shade, going towards the browbone.  This will help soften the black.  You can also take the grey and blend a small amount down towards the pink color and apply a small dab in the inner corner of each eye which will help your eyes look more awake.  This look requires a light touch (don't press your brush too hard into the palette) and a lot of blending.  It is a wearable, smokey look for day or night.


The picture above has been slightly lightened to show how each color blends well together and creates a look similar to cotton candy.


Full face look-"Spoiled Brat" trio used on the eyes, Wet n Wild Mega Eyes cream eyeliner in "Black" on top lid and Diorshow Iconic mascara.

Saturday, January 15, 2011

Wet n Wild Spring 2011 Eyeshadow Trios

To say I have been surprised by the Wet n Wild brand over the past year is an understatement.  Wet n Wild has always made inexpensive makeup that can be easily accessed by everyone.  I have always enjoyed their lip glosses but it wasn't until this past year (thanks to Youtube videos) that I discovered their Coloricon collection.  The quality, price, pigmentation and color selection have never been better until now.  New for Spring 2011 is their Coloricon eyeshadow trios which are joining (permanently) the already stellar selection available.  Currently you can find the Coloricon collection in single eye shadows, eyeshadow trios and eyeshadow palettes.  In the permanent collection there are 7 single eye shadows, 6 trios and 4 6-pan palettes to choose from. 

What I like most about the 2011 additions is the color selection.  Wet n Wild already offers some nice colors but these are geared towards everyone...brave or conservative!  Almost every color in each trio is pigmented to the point that it's hard to believe the price.  Each trio is priced around $2.95!!!  The price is even lower if you can catch a 50% off sale like I did.  I went to Walgreens where they were having a 50% Wet n Wild sale this past week.  I paid just under $9 for all 6 trios!  I also picked up 2 coloricon liners which were 50% off the original price of .99!!  I can honestly say that these eye shadows put some of my high-end ones to shame.

HERE ARE THE 2011 TRIOS (there will also be 3 additional 8-pan palettes added to the 2011 line-up but I have yet to find these.  The 8-pan palettes will only be available in Walgreens or Walmart)

"I'm Feeling Retro"

This palette offers a browbone color that swatches as a frosty, yet sheer white.  The crease color is a surprisingly sheer blue that first appears in the pan as a mid toned blue but swatches lighter.  The eyelid color is a brightly blue-toned purple/pink.  Each color in this palette has a duo chrome appearance and are very easy to blend.  The blue was not as pigmented as the other two however it would be a nice blue for someone who wanted to experiment without being overwhelmed.

L-R: Without flash and with flash.


"Spoiled Brat"

This palette is very nice.  I really love the shimmery silver color for the browbone however I feel this would look great all over the lid.  The silver is shimmery and not glittery at all.  The black in the middle however does have glitter reflects but they disappear once it is blended.  The black is not as pigmented as the other two colors and is possibly the least pigmented out of all the colors in the trios.  Sometimes a less pigmented black is actually good since so many black colors are difficult to work with due to their over-powering nature.  The third color for the lid is an awesome, bold pink.  It's blue-toned pink and really makes a statement. 


L-R: With flash and without flash.


"I Dream of Greenie"

This palette is the most unusual out of the 6.  If you like neons, then this is the one for you.  I am actually quite fond of green eyeshadow and the middle shade is my favorite with my skin tone.  The browbone color is a frosty, slightly silvery-green color.  The middle shade is more wearable and would look nice in the crease or all over the lid.  The third shade is a neon green color with shimmer.  It's bold but easy to work with and blend.  The good thing about this green palette is the blendability and pigmentation.


L-R: Without flash and with flash.


"I'm Getting Sunburned"

This palette was the one I really wanted.  I heard all of the hype online about the middle shade and it's insane pigmentation.  I really wanted a new gold and the pink looked great.  The browbone color is a nice, shimmery pink which is soft and very wearable.  The middle shade for your crease is exceptionally pigmented.  It's very dark and has bronze shimmer throughout.  The shimmer stays even after blending.  The lid color is a cool bronze-like gold which goes on very smoothly.  This palette did not disappoint!


L-R: With flash and without flash.


"I Got Good Jeans"

I was excited to see a navy in this trio.  I'm always looking for a soft, wearable navy eyeshadow.  When I saw this palette I was excited not just because of the navy but also because of the gold and bluish-grey color as well.  The browbone color is a shimmery blue-toned grey which works well with most colors as a highlight and looks awesome with a smokey eye.  The crease color is a well-rounded navy which sheers out wonderfully and is pigmented well.  The lid color is a shimmery gold which compliments the other two colors.


L-R: Without flash and with flash.


"Silent Treatment"

This palette is my favorite out of all of them.  It is the most wearable among the 6.  The browbone color is a gorgeous, shimmery pinky shade.  It goes on smooth and is not chalky.  The crease color is a strongly pigmented brown with light pink glitter mixed in.  I find that some of the glitter does stay after blending but the glitter is very small in size.  The lid color is a fantastic taupe that has a purple/mauve undertone to it.  It is very lovely all over the lid and compliments many skin tones.


L-R: Without flash and with flash.


Each palette as you can see is different however they are all great quality with no disappointments.  Not one single shadow was chalky or poor in quality.  Every makeup lover will find the palette and shade they want no doubt.  What is great about these trios is that they will work with every one's tastes and skin tones.  I hope Wet n Wild continues to do a fantastic job with their brand because I know many make-up lovers and guru's are being swayed their way.  If you haven't tried a Wet n Wild shadow lately, I recommend you do...I don't think you will be disappointed!!